Category: Maintenance & Tip

Professional guides for agricultural machinery maintenance, including shaft removal tips and long-term care for high-durability performance.

  • How to Extend the Lifespan of Your Tiller Shaft and Blades: 5 Essential Tips

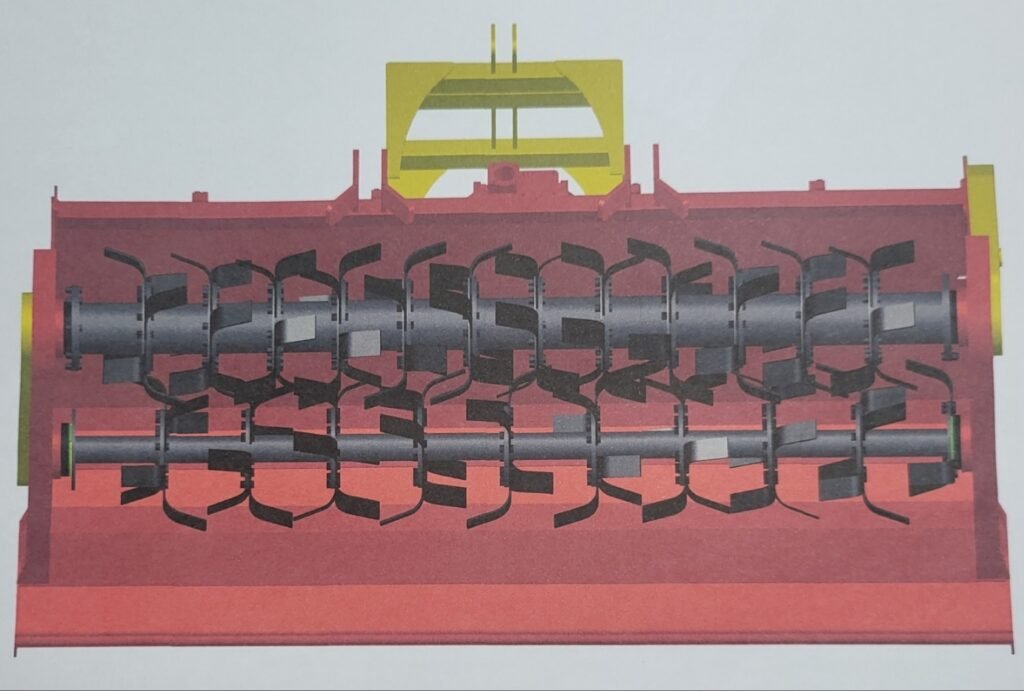
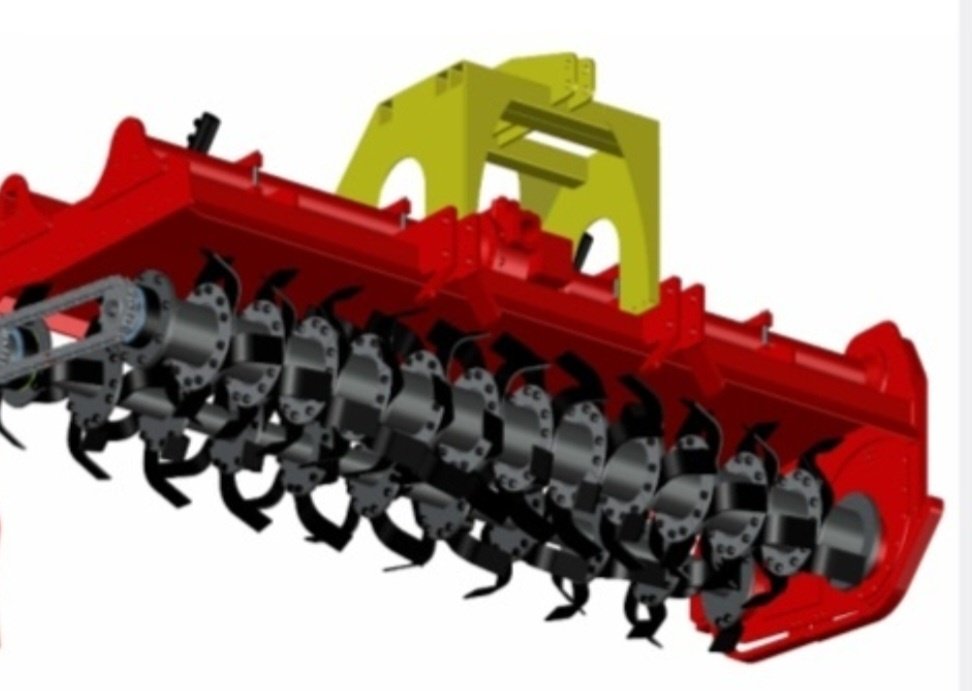
    Tiller Shaft and blade longevity are the most critical factors for reducing operational costs at ORATEXCA. To ensure your equipment performs at its peak throughout the farming season, consistent maintenance is required. In this guide, we will share five professional tips to keep your tiller shaft in top-tier condition.

    1. Daily Cleaning After Use

    Soil and plant debris wrapped around the tiller shaft can cause significant friction and seal wear. Always clear away mud and vines after each shift to prevent long-term damage to the bearing housing.

    2. Proper Lubrication Schedule

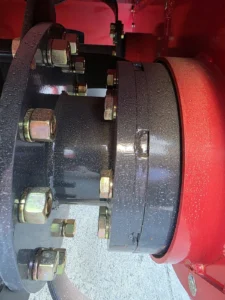
    Friction is the enemy of any tiller shaft system. Ensure you apply high-quality grease to the drive side and bearing points every 50 hours of operation. This simple step prevents overheating and metal fatigue.

    3. Inspecting Bolt Tension

    As we discussed in our previous guide, the connecting bolts on the tiller shaft can loosen due to high-frequency vibrations. Regularly check these bolts to ensure the shaft remains perfectly aligned within the frame.

    4. Monitoring Blade Wear

    Worn-out blades put extra strain on the tiller shaft and the tractor’s PTO. Replacing your POSCO steel blades before they become too thin will protect the entire drive system from unnecessary stress.

    5. Off-Season Storage Preparation

    When the season ends, coat the tiller shaft with a thin layer of protective oil to prevent rust. Store the unit on level ground to avoid any structural warping of the side plates or the main frame.

  • Tiller Shaft Maintenance: How to Remove the Shaft Without Disassembling Side Plates

    Tiller Shaft maintenance is essential for maximizing productivity at ORATEXCA. We know that every minute of machine downtime in the workshop is a minute lost on the field. That’s why the GK7 series is engineered for ‘Disassembly-Free Maintenance.’ Today we will show you how to remove the tiller shaft quickly and easily without the hassle of taking apart the entire side frame.

    1. The Innovation: Disassembly-Free Design

    Internal view of ORATEXCA dual-shaft system

    Unlike conventional rotary tillers that require you to take apart the entire side plate unit to access the blades, the GK7 allows for direct tiller shaft removal.

    • Time Saving: Reduce maintenance time by up to 70%.
    • Safety: Minimizes the risk of damaging hydraulic lines or structural bolts during disassembly.

    2. Preparation & Safety First

    Before starting, ensure the tractor engine is off and the tiller is securely supported on level ground.

    • Tools Needed: Standard wrench set (following KS/JIS metric standards).
    • Tip: Use the hydraulic cylinder to lift the rear cover for better access.

    3. The Removal Process

    Technical diagram of GK7 disassembly-free tiller shaft removal
    • Step A: Locate the connecting bolts on the bearing housing. Make sure to clean the area around the bolts to prevent debris from entering the housing during the tiller shaft extraction.
    Connecting bolts on GK7 tiller shaft bearing housing
    • Step B: Loosen the secure pins on the drive side (Chain Drive #100). Check the condition of the drive chain simultaneously to ensure peak performance of your tiller shaft system.
    • Step C: Slide the shaft out directly without touching the main frame or side plates.

    4. Why It Matters: Built-in Durability

    Our tiller shafts are made from high-strength steel to withstand the vibration of the Dual-Shaft system. By simplifying the removal process, you can perform routine blade inspections more frequently, ensuring your POSCO steel blades always perform at their best..

    Maintenance Tips for Longevity

    To ensure your Tiller Shaft remains in top condition for years, follow these essential maintenance tips:

    • Regular Lubrication: Apply high-quality grease to the bearing housing every 50 hours of operation to reduce friction and heat.
    • Bolt Tension Check: Periodically inspect the connecting bolts mentioned in Step A to ensure they haven’t loosened due to field vibrations.
    • Debris Removal: After each use, clear away wrapped vines or heavy mud from the tiller shaft to prevent seal damage.

    Frequently Asked Questions (FAQ)

    • How often should I inspect the tiller shaft? We recommend a quick visual inspection before every shift and a detailed check every month.
    • Do I really need to remove the shaft for blade changes? While not always mandatory, removing the tiller shaft as shown in this guide provides better access and ensures a safer working environment.
    • What if I hear a grinding noise? Stop operation immediately. This usually indicates a bearing issue within the housing that requires attention before the tiller shaft becomes damaged.